Build a Fleet of AI Agents on UpCloud Kubernetes
On this page
Most “AI agent” demos are a chat box wired to an API key. That is not a fleet, and it is not something you would let near production. A fleet is several agents, each with a distinct job, each reachable in the channel where the work already happens, each with its own budget and its own memory, and all of them making changes through a process a human can review and revert.
This post walks the whole path. UpCloud Public Cloud provides the infrastructure, the Ankra AI DevOps Platform provisions and manages Kubernetes on top of it, and Hermes agents run on the cluster. It is the build we run at the UpCloud and Ankra workshop, condensed.
UpCloud currently runs a 500 euro trial over 30 days, which funds all of this comfortably. A dev sized cluster with one control plane node and one worker, bastion included, is about 49 euro a month. The production shaped build below comes to roughly 185 euro a month, so the trial covers it for a month with room left over.
The cluster comes first, and that is the point
An agent that can only talk is easy. An agent that can build needs somewhere to build, and that somewhere needs ingress, DNS, TLS, block storage and a source of truth. Stand those up once and every agent inherits all of it. Skip them and each agent becomes a pile of manual glue.
So the first four steps are the platform, and the last three are the fleet.
A token and a credential
Sign up at UpCloud, then open Settings and the API tokens tab. Create a token, leave “allow this token to create other tokens” unchecked because Ankra never needs it, and keep access from all IP addresses on so Ankra’s workers can reach the API. The token starts with ucat_ and is shown exactly once, so copy it before you close the dialog.
One thing to have ready: UpCloud asks for card details during sign-up. That is a know-your-customer check rather than a charge, and the trial credit is what actually pays for what you build. Without a card on the account the cluster cannot be created, so do it up front rather than halfway through a workshop.
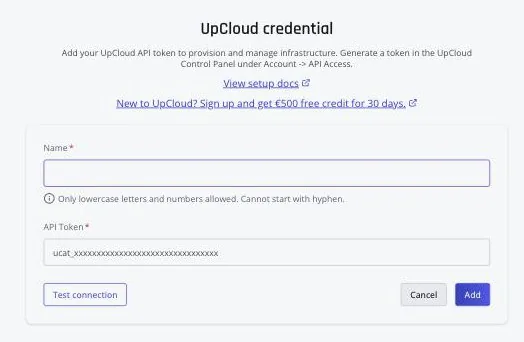
Then sign up at platform.ankra.app, go to credentials, and add UpCloud as a cloud provider. Paste the token and hit Test connection before saving. Green means Ankra can list your account’s zones and plans, which is exactly what the create wizard needs next.
Create the cluster
There are three ways to do this and they land in the same place: the web form, the AI chat (press Cmd or Ctrl plus J anywhere in the platform and ask for “an UpCloud Kubernetes cluster that is highly available and production ready”), or your own coding agent driving the CLI. Install the CLI with one line and run ankra skills install --editor claude-code to drop the Ankra skills into Claude Code or Cursor, and it can create clusters, build stacks and troubleshoot from a single prompt.
The form is worth walking through once, because it shows you how the platform thinks.
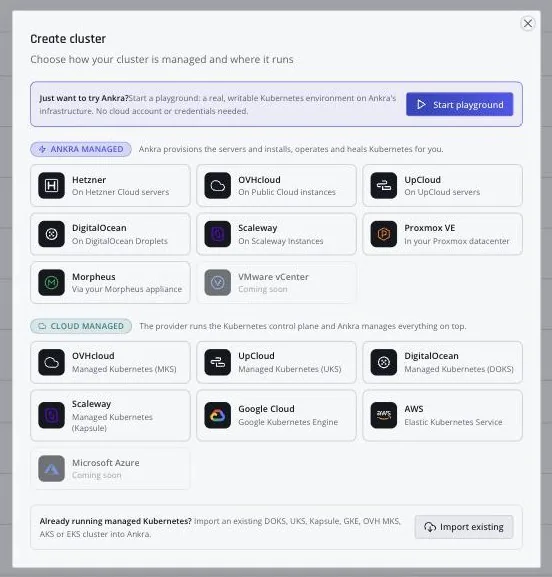
Pick UpCloud under Ankra Managed. Every zone, plan and price on the pages that follow is read live out of your own UpCloud account through the credential you just added. None of it is a hardcoded catalog.
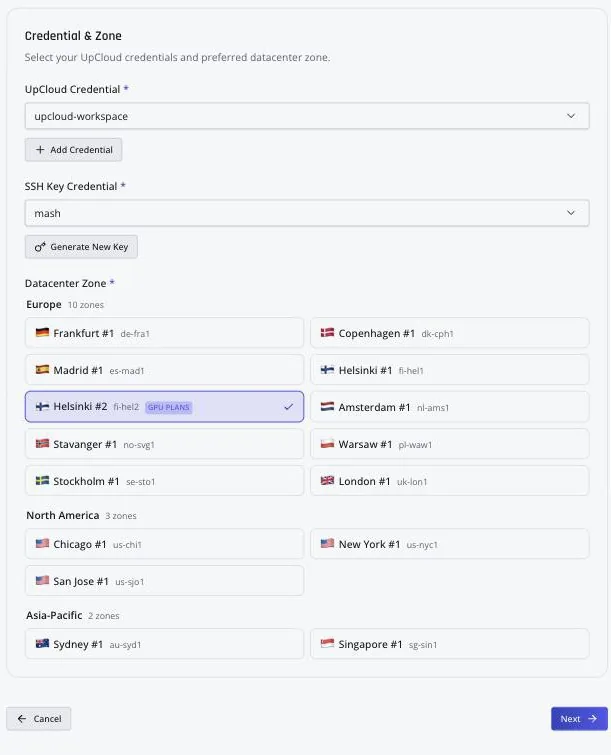
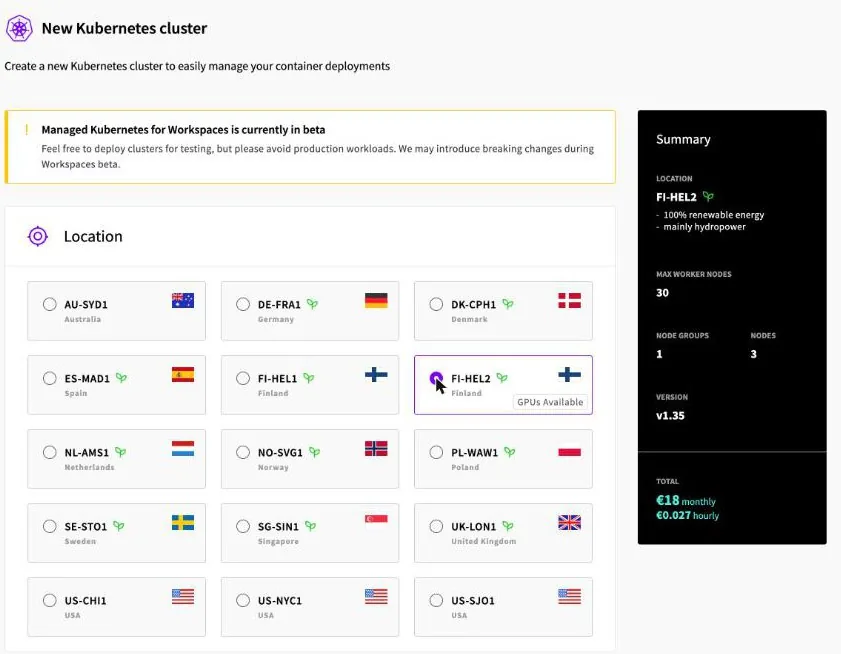
Zones are grouped by region and the picker flags extra capability. GPU plans only exist in Helsinki 2 (fi-hel2), so if there is any chance of GPU work later, start there. Everything else is a latency and data residency call.
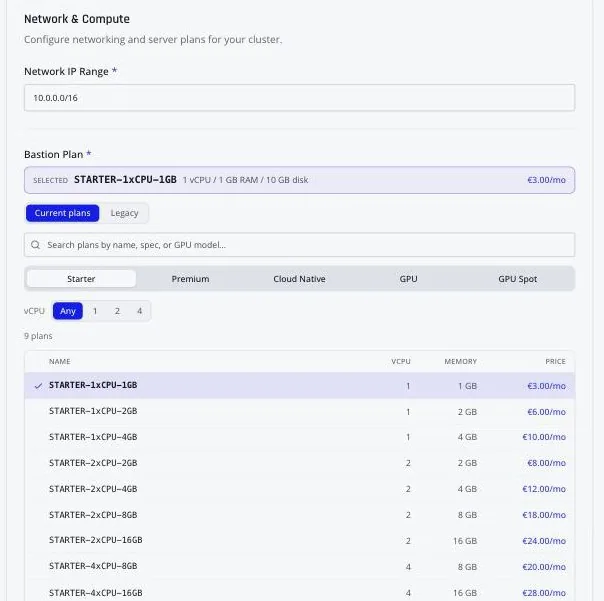
The private SDN network all nodes sit on defaults to 10.0.0.0/16, which is fine unless it would collide with something you intend to peer with. The bastion is the only server with a public IP, and it is an SSH jump host only: no workload traffic and no egress go through it. Three euro a month buys the entire management path, so the smallest plan is genuinely enough.
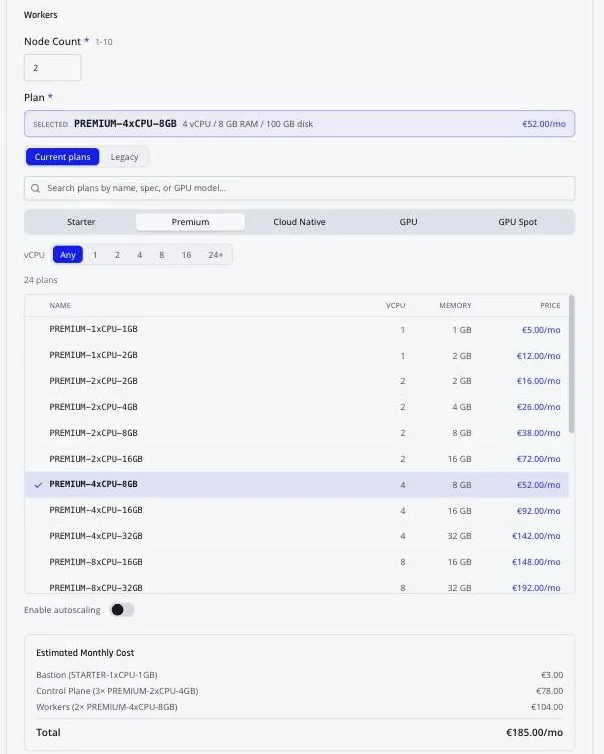
One control plane node is fine for a playground and three is what production means, since three with stacked etcd survives losing one. Workers are where your workloads actually run, so size for the stacks you intend to install. Two PREMIUM-4xCPU-8GB workers comfortably carry an observability stack, an ingress layer, a security scanner and a few apps. Autoscaling is a checkbox if you would rather Ankra move the worker count against demand. The estimated monthly cost box at the bottom updates as you go, before you commit to anything.
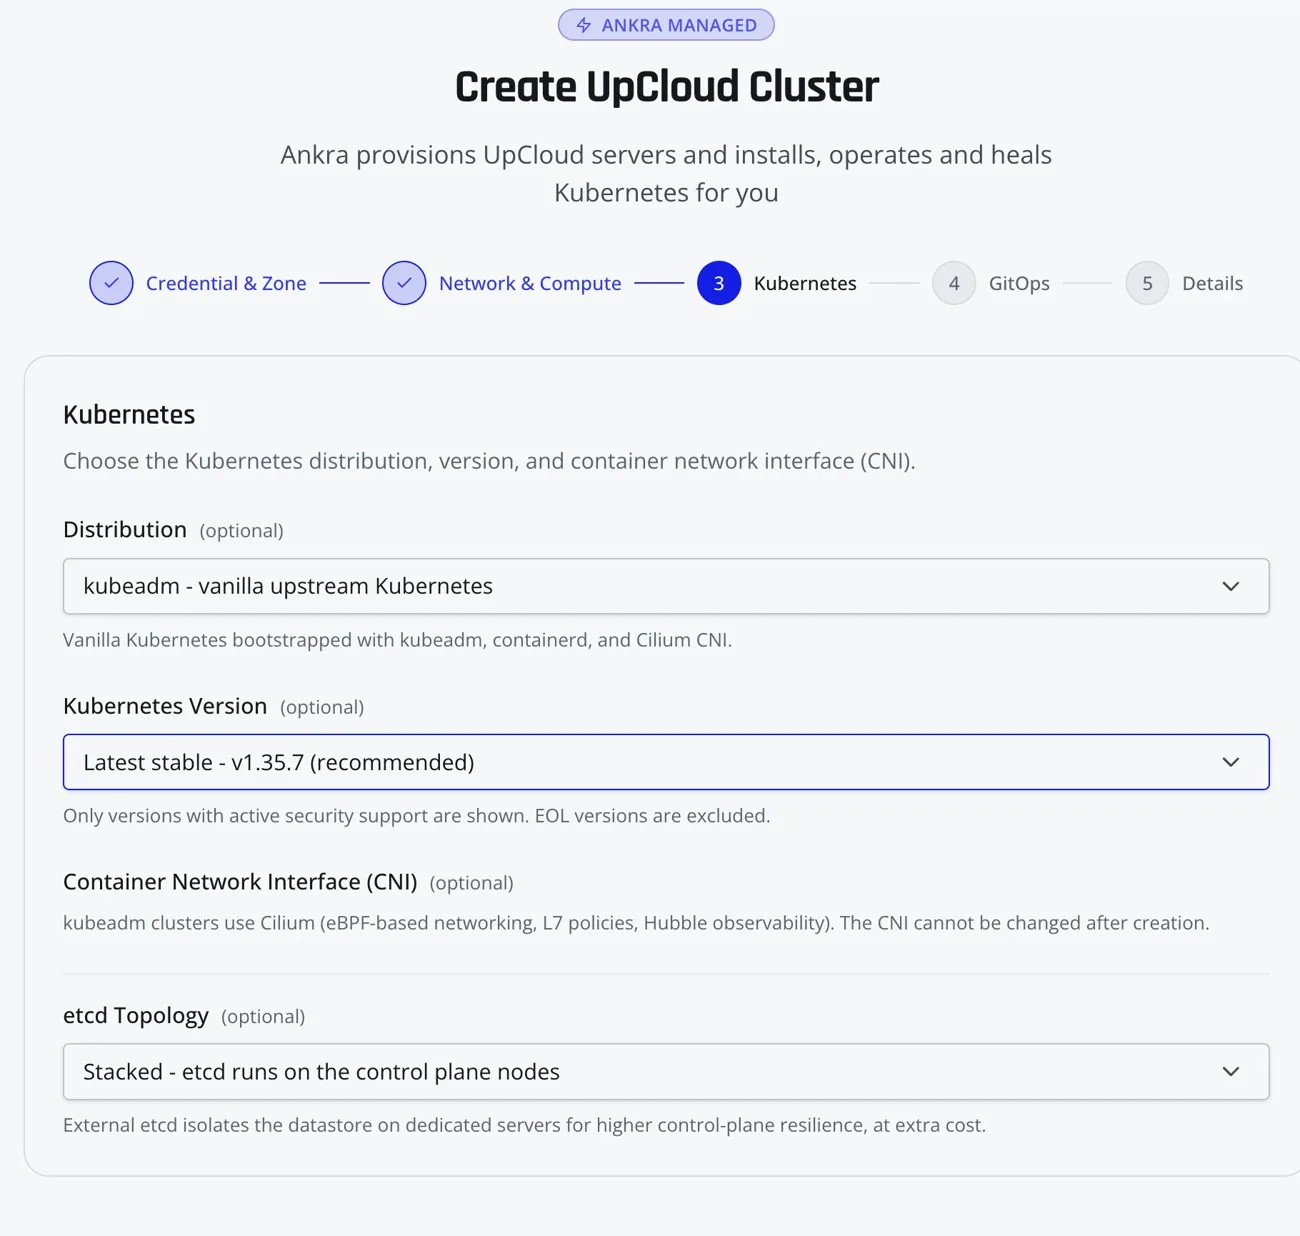
For the distribution, kubeadm is preselected: vanilla upstream Kubernetes with containerd and Cilium, which is the closest thing to what you would run in a datacenter. Cilium brings eBPF networking, L7 policies and Hubble, and the CNI cannot be swapped after creation, so that choice is made here. K3s is the lighter alternative and does let you pick a CNI. Only Kubernetes versions with active security support are offered, so EOL versions are simply not in the list.
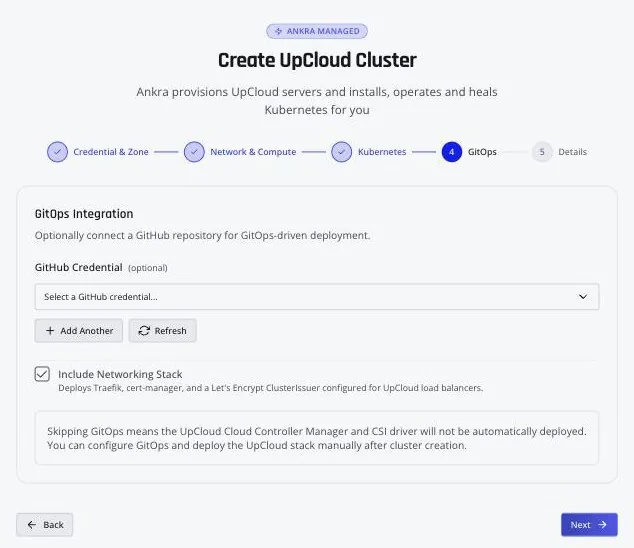
The GitOps step is optional and it is the one that turns a cluster into a platform. Connect a GitHub credential, pick a repository and branch, and every stack and add-on Ankra deploys is written back to Git. It matters more here than usual, for reasons the fleet section gets to.
Leave include networking stack ticked. It deploys Traefik, cert-manager and a Let’s Encrypt issuer already configured for UpCloud load balancers. Public DNS is on by default with nothing to tick: the cluster gets its own delegated subdomain on ankra.cc and external-dns arrives with its credentials already wired.
Name it, and create.
Watch it come up, then look at who owns it
Creation is a tracked operation and every step under it is a job you can open and read: the SDN router, the private network, the NAT gateway that gives nodes egress, SSH key deployment, the bastion, the control plane and worker servers, the Kubernetes install, and finally the Ankra agent. The cluster shows offline until the agent connects, then flips online, and the UpCloud cloud provider stack (CCM and CSI) lands on top to give you working LoadBalancer services and persistent volumes on UpCloud block storage.
If a job fails, open it. The logs and the error are right there, and in most cases it is an UpCloud account quota on servers, networks, routers or IP addresses rather than anything about the cluster itself.
What you end up with is worth being explicit about. None of your control plane or worker nodes have a public interface. They sit in a private UpCloud SDN network, egress through the managed NAT gateway, and the bastion exists purely so Ankra can provision and reconcile them over SSH. The Ankra agent dials out to the platform. Nothing dials in.
Every resource is visible in your own UpCloud console, on your bill, under your keys. Ankra creates, updates and manages them but never owns them. What Ankra holds is the configuration, one place that describes the entire environment, which is the thing that stops scaling from turning into technical debt.
A public hostname you did not have to buy
Your cluster comes up with something like yourcluster.yourorg.ankra.cc. external-dns watches your ingresses and creates the records, Traefik is the default ingress class so an app only needs a hostname, and cert-manager with the letsencrypt-prod issuer produces the certificate. Deploy an app with a hostname under that subdomain and HTTPS works. No DNS provider, no certificate wrangling, no waiting on anyone.
kubectl without a VPN
There is no public API endpoint and no tunnel to build. Grant yourself cluster access, then:
ankra loginankra cluster kubeconfig add <cluster_id>kubectl get nodesAnkra mints a short lived token and routes kubectl through its API proxy to the agent, so credentials are ephemeral and tied to your SSO identity. logs -f and exec work through it too.
Or let UpCloud own the cluster instead
If you would rather UpCloud own the cluster resource outright, create an UpCloud Managed Kubernetes (UKS) cluster in the UpCloud console and import it. Node groups, scaling and version upgrades stay in UpCloud’s hands, while Ankra manages everything running on top: stacks, add-ons, GitOps and the AI. Imported clusters come with a hard guarantee. Ankra never deprovisions infrastructure it did not create, so removing the cluster from Ankra never touches the cluster in UpCloud.
Back in Ankra, use the Already running managed Kubernetes? link at the bottom of the create dialog, pick UpCloud Kubernetes (UKS) and your credential, and hit Discover. Every UKS cluster the token can see is listed, with the ones already imported marked as such.
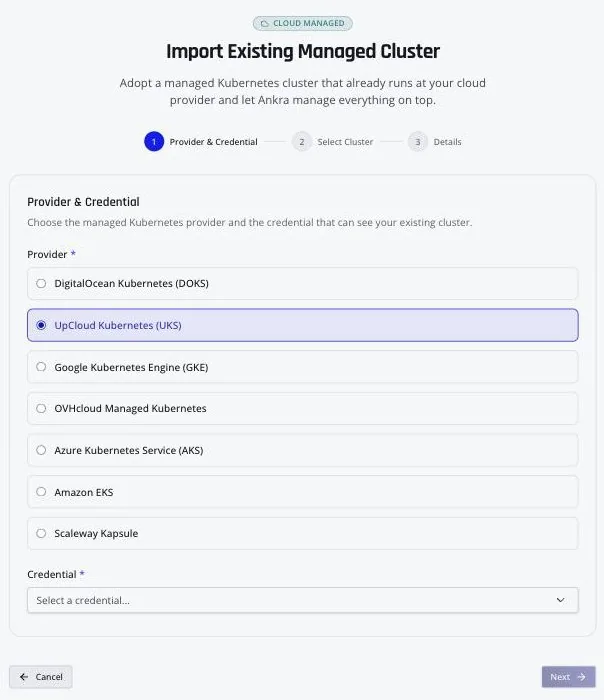
ankra cluster managed discover --provider uks --credential-id <credential-id>ankra cluster managed import --provider uks --credential-id <credential-id> \ --provider-cluster-id <uks-cluster-id> --name my-uksThere is no manifest to download and no command to run against the cluster. Ankra fetches the kubeconfig through the UpCloud API, stores it in its vault, and installs the agent itself. From there the agent steps below are identical, because stack profiles and the AI neither know nor care who created the cluster.
The first agent
Hermes is an AI agent that runs on your cluster and talks to you in Telegram. Ask it what is running, ask it to diagnose something, or hand it a goal and it designs the infrastructure, shows you a bill of materials, and builds it once you say yes.
Deploying one is the same flow as any stack. Open Stack Profiles and pick hermes-agent.
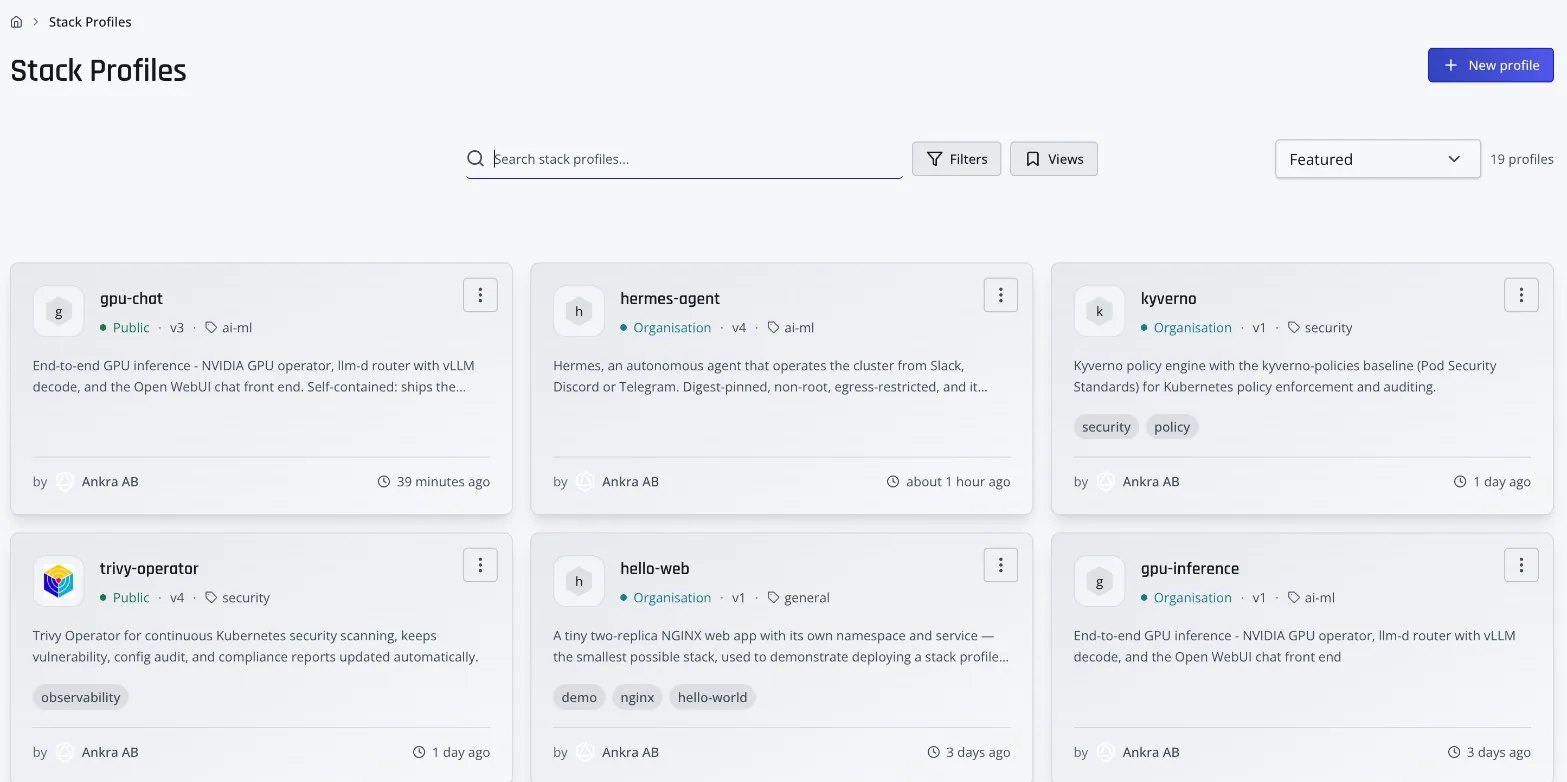
Choose your cluster and fill in the form. Most of it arrives prefilled and every field carries its own instructions, so the model name and endpoint are already set to a hosted Qwen3 that works out of the box.
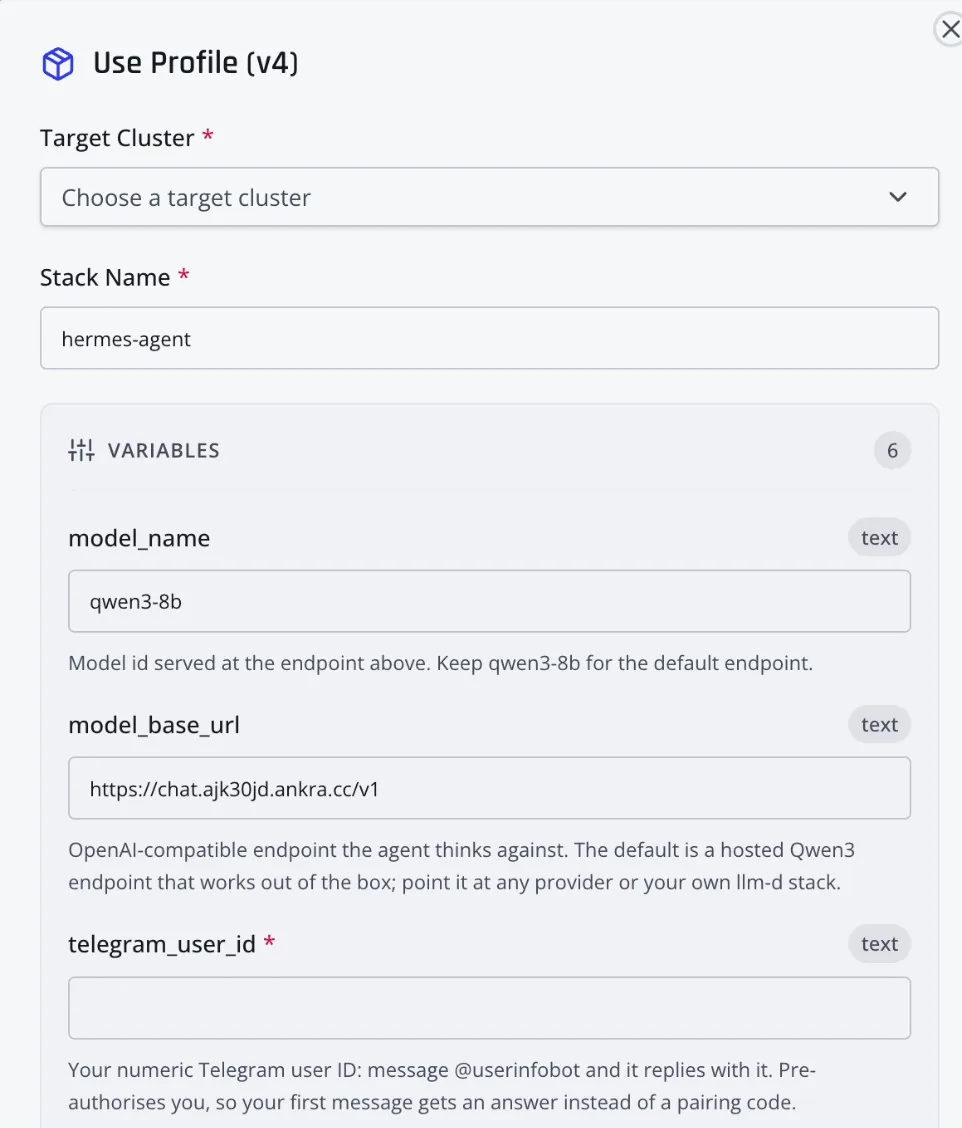
What you actually supply is four things: your Telegram user ID from @userinfobot, a bot token from @BotFather, a model key (an OpenRouter key works directly against the prefilled endpoint), and a password for the agent’s dashboard sign-in. Each secret can also be bound to an existing slot so the value never leaves Vault.
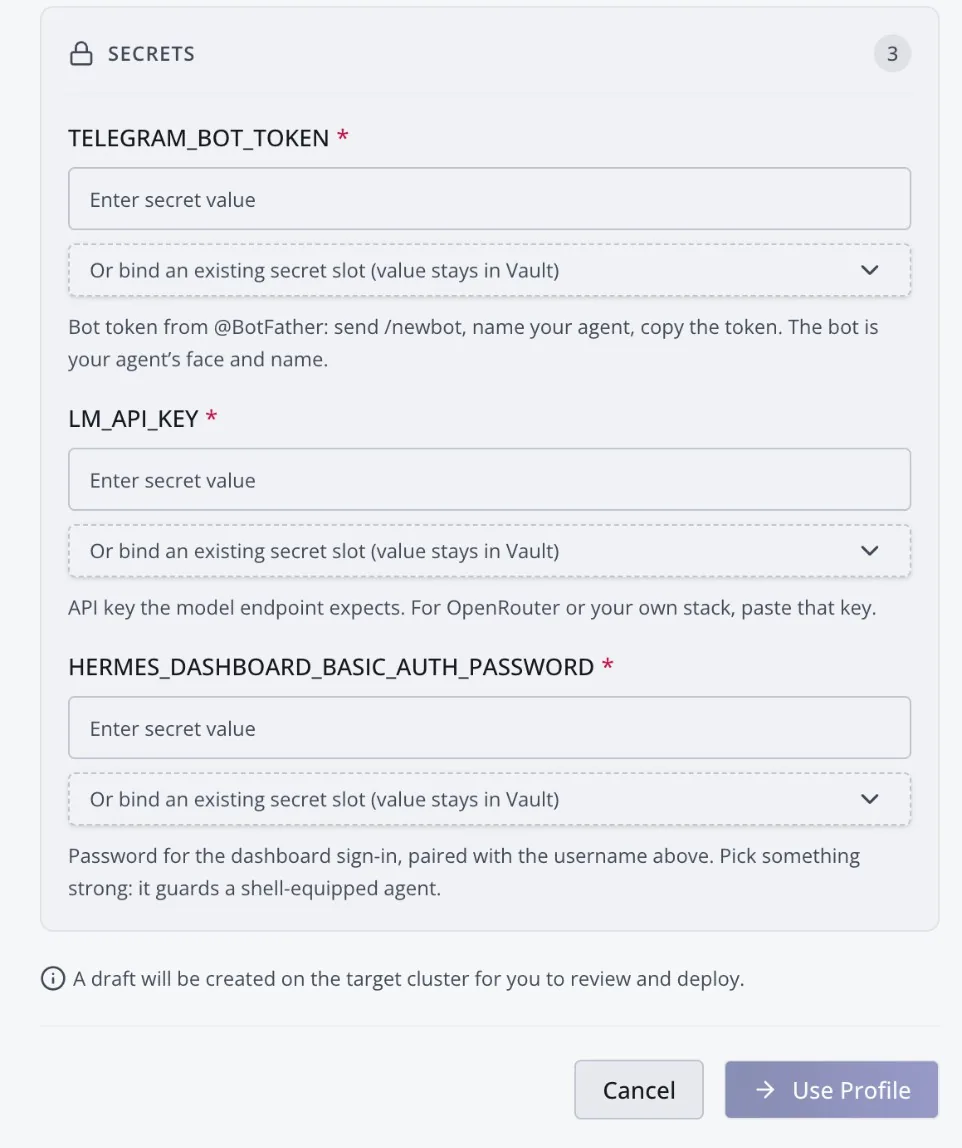
Deploy, then message your bot. It answers immediately because your ID pre-authorised you. Anyone else who finds it gets a pairing code and silence until you approve them, which is also how you add a teammate later.
Everything else is handled. The profile brings its own namespace, the Secret holding your keys, the agent configuration, and Ankra’s hardened chart, so the agent runs with a pinned image, keys only from a Secret and outbound HTTPS only, without you configuring any of it.
ankra stack-profiles apply hermes-agent --cluster <cluster> --deploy \ --set telegram_user_id=<your-telegram-id> \ --set-env manifest.hermes-credentials.stringData.TELEGRAM_BOT_TOKEN=TELEGRAM_BOT_TOKEN \ --set-env manifest.hermes-credentials.stringData.LM_API_KEY=LM_API_KEY \ --set-env manifest.hermes-credentials.stringData.HERMES_DASHBOARD_BASIC_AUTH_PASSWORD=HERMES_DASHBOARD_PASSWORDGrow it into a fleet
A second agent is the same profile deployed again under a different name, with a different bot and a different personality. That is the entire trick, and it is why this scales into a team rather than one overloaded assistant.
Each agent gets three things of its own. A personality, meaning who it is and how it behaves: a cautious infrastructure agent that always shows its bill of materials, a terse on-call diagnostician, a reporter that summarises the day. A channel, meaning its own bot and therefore its own contact, with Telegram, Discord and Slack all supported, so the on-call agent can live in the incident channel and the infrastructure agent in the platform channel. And its own keys and memory, so a per agent model key is a per agent budget, and each agent remembers its own work across restarts.
To let an agent operate the platform, give it an identity with ankra tokens create <agent-name> and put that token in its Secret. It can then list clusters, build stacks and deploy, through the same GitOps flow as everything else and visible in Ankra like any other change. Destructive actions still ask first.
GitOps is what makes a fleet efficient rather than merely capable
An agent never pokes at a cluster resource by resource. It works the way the platform works.
Ask for “a Postgres, a Redis and an ingress for my app” and the agent assembles all of it into a single stack draft, dependency ordered, with the values filled in. Nothing has touched the cluster yet. The draft renders as a bill of materials: exactly what will be created, changed or removed, and what it costs. You review one thing instead of a dozen kubectl commands, and changing your mind edits the draft rather than the cluster. This is the same drafts and approvals flow humans use, which is the point.
When you approve, the whole change lands as one commit in the repository you connected and Ankra rolls it out from there. Every job that runs is traceable to that commit and to the agent that made it. Rollback is a revert, and the agent can do that too.
The part that matters most for a fleet is that Git becomes the memory they share. Every agent reads the same repository, so the on-call agent diagnosing a stack sees the exact configuration the infrastructure agent deployed. There is no drift between what an agent believes is running and what is running.
Two payoffs follow. Additive changes that remove nothing can be allowed to run without a confirmation click, so an agent asked to add a cache adds it and reports back with the bill of materials it already applied. And because the repository carries the whole environment, an agent can build a second cluster identical to the first by pointing the same stacks at it. That is also how a stack profile is born: capture what works and roll it onto the next cluster.
Mind the credit
Compute is the obvious cost and the wizard shows it before you commit. The less obvious one is storage, because persistent volumes created by the CSI driver are UpCloud block storage devices that bill independently of the servers. The agents themselves are light, a fraction of a CPU and a small volume each, so the 185 euro build runs a whole fleet. Their real running cost is the model keys, which you already scoped per agent.
When you are done, deprovision from cluster settings under the danger zone. That removes the servers, networks, router, gateway and SSH keys. Delete your PVCs first, or check Block Storage in the UpCloud console afterwards, because orphaned disks keep billing quietly long after the cluster is gone.
If you want the performance numbers behind the provider choice, we ran an identical benchmark suite across UpCloud, OVH and DigitalOcean and then against AWS, GCP and Hetzner.
Everything here is also available from the CLI and the API if you would rather script it, and the AI chat can run the whole flow end to end if you would rather just describe what you want.
Get started: Create a free account on Ankra and claim the UpCloud 500 euro trial.
Join our community: Slack
Follow us on: LinkedIn | GitHub
Contact us: [email protected]
Get the next post in your inbox
Related Posts
Spectro Cloud vs Ankra: Managing the Metal, or Running What Lives On It?
Spectro Cloud's Palette is a serious enterprise platform for provisioning Kubernetes estates from the OS up. Ankra is an AI-native platform for running everything that happens on Kubernetes from the app down. The honest comparison, including when Palette is the right call.
Using Cursor with the Ankra CLI as an Infrastructure Subagent
Cursor is good at application code but loses context the moment a change crosses into Kubernetes, Helm, and CD pipelines. Adding the Ankra CLI as an infrastructure subagent gives it cluster-aware grounding so developers and platform teams can work on the same artifacts.